Unlocking the Power of Solar Energy: Installing a 750W Free Energy Solar Panel System with INVT Solar Inverter
Transitioning to renewable energy sources has become an essential step towards sustainable living. In this article, we will explore the process and benefits of installing a **750W free energy solar panel system** paired with an **INVT solar inverter**. Learn how this setup can reduce your electricity bills and promote environmental conservation.
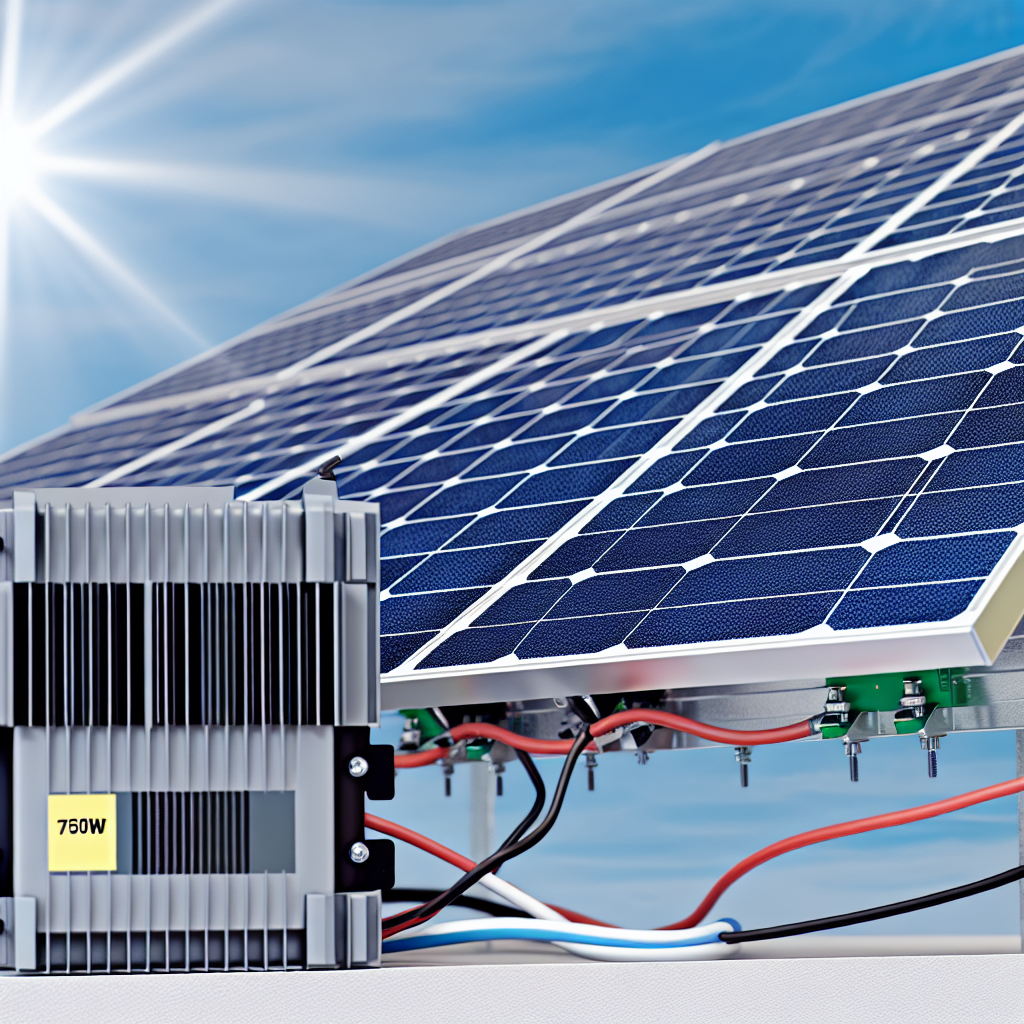
Understanding the Components: Solar Panel and INVT Solar Inverter
Before diving into the installation process, it’s important to understand the core components involved:
- 750W Solar Panel: A high-efficiency panel capable of generating up to 750 watts of power under optimal sunlight conditions. Its compact size makes it suitable for small-scale residential or portable applications.
- INVT Solar Inverter: A crucial device that converts the direct current (DC) produced by the solar panel into alternating current (AC) used by household appliances. INVT inverters are renowned for their durability, efficiency, and advanced features such as MPPT (Maximum Power Point Tracking).
Pairing these components ensures a reliable, eco-friendly, and cost-effective energy solution suitable even for limited spaces or budget-conscious users.
Step-by-Step Guide to Installing a 750W Solar Panel with INVT Inverter
Installing a solar energy system involves meticulous planning and execution. Here are the key steps:
- Site Assessment: Identify an optimal location with maximum sun exposure, minimal shading, and appropriate structural support for mounting the solar panel.
- System Design: Determine the optimal tilt angle and positioning based on geographic location to maximize energy harvest. Select compatible mounting brackets and electrical components.
- Installation of Solar Panel: Secure the panel on the chosen surface, ensuring stability and proper grounding to prevent electrical faults and damage.
- Electrical Wiring and Connection: Connect the solar panel to the INVT inverter using appropriate DC cables. Ensure all connections are insulated and waterproof.
- Inverter Setup and Integration: Install the INVT inverter in a well-ventilated, protected area. Configure the inverter settings for optimal performance, including voltage and current parameters.
- Testing and Monitoring: Power on the system and verify the output. Use monitoring features to track energy production and identify any issues promptly.
Throughout this process, safety guidelines and local electrical codes must be strictly followed to ensure a secure and efficient installation.
Benefits and Considerations
Implementing a **750W solar panel system paired with an INVT inverter** offers numerous advantages:
- Significant reduction in electricity bills over time
- Environmental impact: harnessing clean, renewable energy
- Enhanced energy independence and resilience against grid fluctuations
- Long-term durability and low maintenance costs with quality components like INVT inverters
However, it’s important to consider factors such as local sunlight availability, initial investment costs, and potential space constraints. Proper planning and consultation with solar professionals can maximize your system’s efficiency and lifespan.
Conclusion
Installing a **750W free energy solar panel system with an INVT inverter** is an excellent way to embrace sustainable energy solutions. Understanding the components, following proper installation steps, and considering long-term benefits ensures a successful setup. By investing in this eco-friendly technology, you not only save money but also contribute to a greener future. Start your solar journey today for a brighter and cleaner tomorrow.